Bathroom Mold Removal: Complete Guide for Homeowners
Expert guidance from our California remediation team — plus local crews in 50+ cities when you're ready for help.
Bathrooms are the single most common place for mold in California homes. Every hot shower pumps moisture into the air, and if your ventilation can't keep up, mold takes hold on grout, caulk, ceilings, and drywall. This guide covers what causes bathroom mold removal jobs to go wrong, how to safely clean small areas yourself, and — critically — when to stop and call a professional.
In this guide
- Why Bathrooms Grow Mold So Fast
- Identifying the Mold in Your Bathroom
- How to Safely Clean Small Bathroom Mold Patches
- What NOT to Do: Common Bathroom Mold Mistakes
- When Bathroom Mold Means Calling a Professional
- Bathroom Mold Removal Tools and Supplies Checklist
- Grout vs. Caulk vs. Drywall: Where Mold Hides and What Each Needs
- Preventing Bathroom Mold for Good
- Bathroom Mold and California Renters: Know Your Rights
- FAQs
Why Bathrooms Grow Mold So Fast
Bathroom mold removal starts with understanding why bathrooms are mold magnets. Mold needs three things: moisture, warmth, and a food source. Bathrooms supply all three in abundance.
Moisture: A 10-minute hot shower can raise bathroom humidity above 90%. Without a working exhaust fan, that moisture settles on every surface and can take hours to evaporate. In California's coastal cities — San Diego, Los Angeles, San Francisco — ambient humidity is already higher, so bathrooms dry even more slowly.
Food sources: Mold feeds on soap scum, body oils, dust, and the paper backing of drywall. Even tile grout is porous enough to harbor colonies once soap residue builds up.
Warmth: Bathrooms are among the warmest rooms in the house, and mold thrives between 60 and 80°F.
The worst offenders are bathrooms with no exhaust fan, a fan that vents into the attic instead of outside (shockingly common in older California homes), or fans nobody bothers to turn on. Leaky plumbing — a slow drip behind a toilet or under a sink — is the other major driver. That kind of hidden moisture grows mold inside walls where you can't see it.
Identifying the Mold in Your Bathroom
Before any bathroom mold removal attempt, figure out what you're dealing with:
- Surface mold on grout or caulk: Dark spots or pinkish-orange film on shower grout and caulk lines. Usually superficial and cleanable.
- Mold on the ceiling: Often appears as black or brown spots above the shower, typically from steam condensing with nowhere to go.
- Mold on drywall or painted walls: Soft, discolored patches that may feel damp. This is more serious — drywall is porous, and mold roots grow deep into it.
- Musty smell with no visible mold: Often means mold is growing behind tile, under flooring, or inside the wall cavity from a hidden leak.
Color doesn't reliably tell you whether mold is dangerous. "Black mold" (Stachybotrys chartarum) gets the headlines, but several common bathroom molds look black, and lab testing is the only way to identify species. Treat all mold as worth removing — the health question matters more for how aggressively you respond than for species identification.
How to Safely Clean Small Bathroom Mold Patches
For small, surface-level patches — under about 10 square feet total, on hard non-porous surfaces like tile, glass, or fiberglass — DIY bathroom mold removal is reasonable. Here's the safe way:
- Protect yourself. Wear an N95 respirator mask, gloves, and eye protection. Open a window or run the exhaust fan so you're not breathing concentrated spores.
- Don't dry-scrape or sand. Dry disturbance launches spores into the air. Keep surfaces damp while you work.
- Use the right cleaner. For hard surfaces, scrub with detergent and water, then disinfect. White vinegar (undiluted) kills many common molds; a commercial mold-removal product labeled for bathroom use also works. Avoid mixing bleach with any other cleaner — the fumes are dangerous.
- Scrub grout with a stiff brush. Grout is porous, so surface wiping isn't enough. Scrub firmly, then rinse and dry the area completely.
- Replace moldy caulk. If mold has grown into silicone caulk, no cleaner will fully remove it. Cut out the old caulk, clean the joint, let it dry 24 hours, and re-caulk with a mold-resistant product.
- Dry everything. Mold returns to damp surfaces. Squeegee shower walls after use, run the exhaust fan for at least 20 minutes after showering, and fix any drips.
- Painting over mold. This is the most common mistake in bathroom mold removal. Paint traps the moisture and the mold keeps growing underneath, eventually bleeding through again.
- Using bleach on porous surfaces. Bleach kills surface mold on tile, but on drywall or wood the water in the bleach soaks in and feeds the roots while the chlorine evaporates. You'll get a cosmetic fix and a bigger problem later.
- Ignoring the ventilation. Cleaning mold without fixing the moisture source guarantees it comes back. If your fan is weak, loud, or vents into the attic, that's your real project.
- Caulking over moldy caulk. New caulk over mold just seals the colony in. Always remove the old caulk first.
- Skipping protection. Even "just a little mold" releases spores when disturbed. People with allergies, asthma, or weakened immune systems can react strongly.
- The affected area is larger than about 10 square feet (a patch bigger than a poster board).
- Mold is on or behind drywall, or you suspect it's inside the wall from a plumbing leak.
- There's a musty smell but no visible mold — hidden growth needs professional detection.
- The mold keeps coming back after proper cleaning, which signals a moisture source you haven't found.
- Anyone in the household has asthma, severe allergies, or a compromised immune system.
- You're a landlord — in California, visible mold in a rental triggers habitability duties, and a botched DIY job can become a legal liability.
- N95 respirator mask (not a dust mask or cloth mask — N95 is the minimum for mold work)
- Nitrile gloves (long-cuff if you have them)
- Safety goggles or glasses that seal — spores irritate eyes
- Old clothes you can wash hot or throw away
- Stiff-bristled grout brush and an old toothbrush for tight corners
- White distilled vinegar (undiluted) in a spray bottle
- A commercial mold-removal cleaner labeled for bathroom use, as a backup for stubborn grout
- Microfiber cloths — they grab spores instead of pushing them around
- A utility knife and mold-resistant silicone caulk (for the re-caulk step)
- A small hygrometer to check the room stays below 60% humidity afterward
- A squeegee for ongoing shower maintenance
- Run the exhaust fan during every shower and for 20–30 minutes after. If your fan is more than 10 years old, replace it — modern fans are quieter and move far more air.
- Make sure the fan vents to the outside, not into the attic or wall cavity.
- Squeegee shower walls and doors after use.
- Fix leaky faucets, showerheads, and toilet bases promptly.
- Wash shower curtains regularly and replace them yearly.
- Keep bathroom humidity below 60% — a small hygrometer costs a few dollars and tells you whether your fan is doing its job.
- In coastal California areas with persistent humidity, consider a bathroom-safe dehumidifier.
- Notify your landlord in writing (email is fine) as soon as you spot mold beyond normal shower mildew, especially if there's a leak or a non-working exhaust fan. Keep copies and photos with dates.
- Don't accept "just clean it" for structural problems. Surface mildew on grout is tenant cleaning territory. Mold from a leaking pipe inside the wall, a fan that vents into the attic, or water seeping through the ceiling from upstairs is the landlord's repair responsibility.
- Document everything. Photos of the mold, the leak source, the broken fan. If the landlord delays, this documentation supports complaints to local code enforcement.
- Don't hire your own remediation and deduct it without understanding California's repair-and-deduct rules and their dollar limits — talk to a tenant rights organization first.
Note the limit: this works on hard surfaces. Mold on drywall, subflooring, or behind tile can't be cleaned — the affected material has to be removed and replaced.
What NOT to Do: Common Bathroom Mold Mistakes
When Bathroom Mold Means Calling a Professional
Call a professional for bathroom mold removal when:
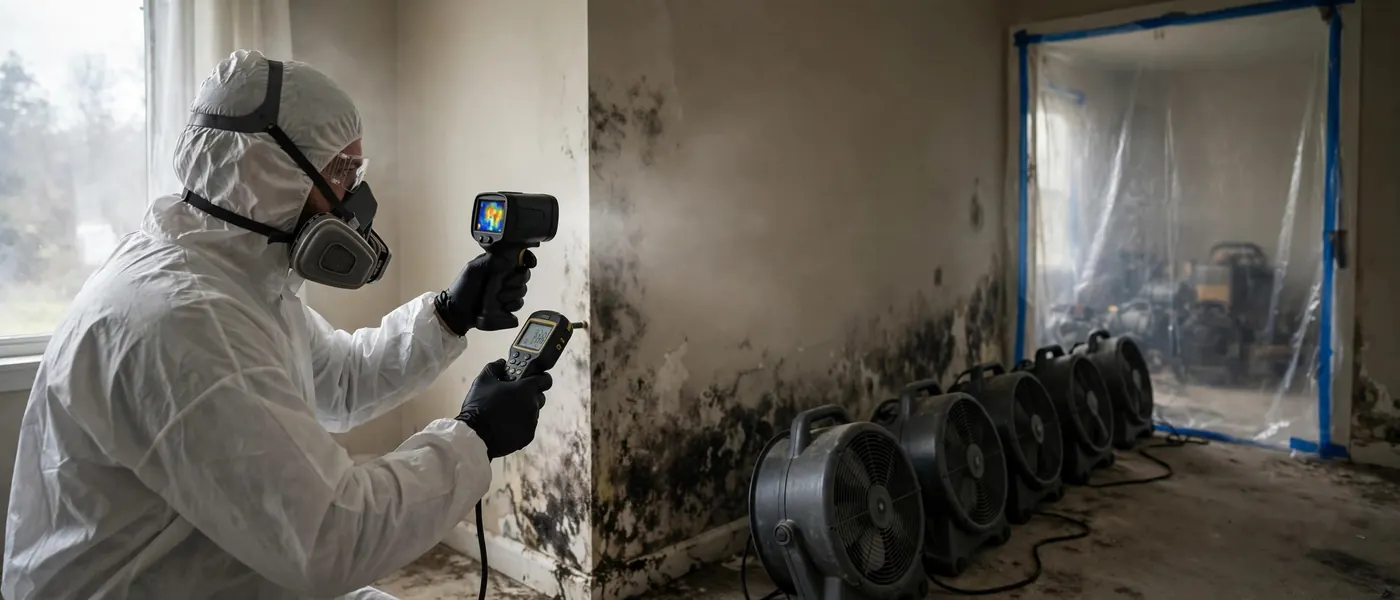
Professional remediation for bathrooms involves containing the work area, removing contaminated porous materials, HEPA-filtering the air, drying the structure, and treating the area with antimicrobial products — then confirming the moisture source is fixed.
Bathroom Mold Removal Tools and Supplies Checklist
If you're tackling a small bathroom mold removal job yourself, gather the right supplies first. Improvising with whatever is under the sink is how jobs go sideways.
Safety gear (non-negotiable):
Cleaning supplies:
Drying and verification:
What you don't need: "miracle" mold bombs, ozone generators, or expensive fogging machines for a small surface job. And skip the bleach-on-everything instinct — as covered above, bleach is fine on porcelain and tile but counterproductive on porous materials.
Grout vs. Caulk vs. Drywall: Where Mold Hides and What Each Needs
Not all bathroom surfaces are equal in a bathroom mold removal job. Matching the treatment to the material is what separates a fix from a cover-up.
Tile grout: Cement-based grout is porous — it absorbs water, soap, and everything mold eats. Surface mold on grout responds to scrubbing with a stiff brush and vinegar or a bathroom mold cleaner. For stained grout that won't come clean, a grout pen or re-grouting the worst joints beats endless re-scrubbing. Sealing grout annually with a penetrating grout sealer slows reabsorption.
Silicone caulk: Caulk is non-porous when intact, but it fails — shrinking, cracking, and peeling at the tub-to-tile joint. Once mold grows into or behind failed caulk, cleaning is futile: cut it out completely, clean and dry the joint for 24 hours, and re-caulk with a 100% silicone product labeled mold-resistant. This one maintenance task prevents an enormous share of shower mold callbacks.
Drywall (including "mold-resistant" drywall): Standard drywall's paper facing is mold candy. Even moisture-resistant (green/purple board) products only resist — they don't immunize. Mold on drywall means the paper and often the gypsum core are colonized; no surface cleaner reaches the roots. The fix is cut-and-replace: remove the affected section (plus margin), treat the framing, and install new board. In showers, cement backer board behind tile is the correct substrate — drywall behind shower tile is a mold disaster waiting for a grout crack.
Ceilings: Bathroom ceiling mold is almost always a ventilation failure signature — steam rises, condenses on the coolest surface, and lingers. Clean it, then fix the fan. If the ceiling is textured popcorn, replacement is often easier than cleaning.
Preventing Bathroom Mold for Good
Bathroom Mold and California Renters: Know Your Rights
Bathroom mold in a rental isn't just a cleaning issue — it's often a habitability issue. Under California law, landlords must maintain rental units in habitable condition, and persistent mold caused by leaks, failed ventilation, or plumbing problems falls squarely in that duty.
Landlords, the flip side: addressing bathroom moisture complaints quickly is dramatically cheaper than remediating a wall cavity full of mold six months later — and far cheaper than a habitability dispute.
Frequently Asked Questions
Is it safe to shower in a bathroom with mold?
Small surface mold on grout is unpleasant but showering is generally fine for healthy people while you arrange cleaning. Large patches, mold on walls or ceilings, or a strong musty smell warrant getting it remediated before heavy use — especially if anyone in the home has respiratory issues.
Does vinegar really kill bathroom mold?
Undiluted white vinegar kills most common household molds on hard, non-porous surfaces. It doesn't work well on porous materials like drywall or wood, where the mold's roots survive. Think of vinegar as a surface treatment, not a remediation method.
Why does mold keep coming back in my shower?
Recurring bathroom mold almost always means unresolved moisture: an underpowered or unused exhaust fan, a fan venting into the attic, a slow plumbing leak, or water seeping behind tile through failed grout. Cleaning treats the symptom; fixing the moisture source treats the cause.
Can I use bleach to remove bathroom mold?
Bleach works on hard, non-porous surfaces like tile and porcelain. Don't use it on drywall, wood, or grout expecting a permanent fix — and never mix bleach with vinegar, ammonia, or other cleaners.
How much does professional bathroom mold removal cost in California?
Small professional bathroom jobs typically run a few hundred dollars; jobs involving drywall removal, leak repair, or tile work run into the low thousands. A reputable company inspects first and gives a written quote before starting.
Get Mold Remediation in Your City
Need Mold Removed Fast?
Our California crews are ready 24/7. Call now for a free assessment and an upfront flat-rate quote in writing.
Upfront flat-rate pricing • Written guarantee • 24/7 emergency service